The Ultimate Setup Guide for Your Gmktec Nucbox K10 Mini Pc
Introduction
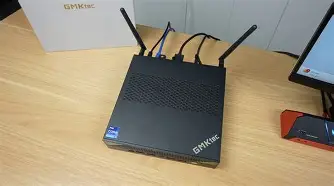
The Gmktec Nucbox K10 Mini Pc has become a notable option in the compact desktop market, appealing to users who want a full PC experience in a small footprint. This guide walks through what to expect from the device, how to set it up for different use cases, and practical tips on configuring hardware and software for optimal performance. It is written for buyers who care about real-world utility: who want the Nucbox K10 to serve as a home office computer, a lightweight media center, a compact workstation, or a modest home server.
What the Nucbox K10 Is Designed For
The Nucbox K10 is designed to balance size, connectivity, and upgradeability. Unlike thin clients or stick PCs, mini PCs in this class typically provide user-accessible slots for M.2 NVMe storage and SODIMM RAM, a full set of I/O ports for peripherals and displays, and a power adapter suitable for sustained workloads. Buyers typically select this type of machine when a small physical footprint, quiet operation, and the ability to run a full desktop OS are priorities.
Detailed Product Analysis
This section analyzes the Nucbox K10 across the dimensions that matter most to buyers: build and thermals, internal expandability, ports and connectivity, display support, performance characteristics, and software compatibility.
Build and Thermal Design
The Nucbox K10 emphasizes a compact chassis that often includes a combination of metal and plastic to manage heat without adding bulk. The thermal solution in mini PCs is always a trade-off between fan noise and sustained performance. Users who plan to run CPU-intensive tasks for extended periods should expect the machine to ramp fan speed under load; however, the thermal layout typically allows short bursts of high performance without thermal throttling. Proper placement—clearance around vents and avoiding enclosed compartments—meaningfully affects sustained performance.
Internal Upgradeability
One strength of the Nucbox K10 and similar mini PCs is the potential for user upgrades. Typical upgrade paths include:
- M.2 NVMe SSD installation for fast primary storage and OS responsiveness
- SODIMM RAM upgrades, allowing more headroom for multitasking and virtualization
- Sometimes a second 2.5" bay or an extra M.2 slot on certain configurations
Before opening the chassis, buyers should verify the exact model they purchased to confirm the number of slots and supported capacities. Static precautions and the correct screwdriver are essential; the internal layout is compact and parts can be delicate.
Ports and Connectivity
A major advantage of mini PCs is a generous mix of ports. The Nucbox K10 typically comes with several USB-A ports, at least one USB-C or USB 3.1 Gen2 connector, HDMI and/or DisplayPort outputs, a Gigabit Ethernet jack, and an audio jack. Some configurations include Wi‑Fi 6 and Bluetooth 5.x modules—useful for wireless peripherals and faster wireless networking. Buyers who require wired networking for reliability or lower latency will appreciate a dedicated Ethernet port.
Find top-rated Laptops & Computers products at great prices.
View Offers →Display Support
For productivity and media consumption, dual-monitor support is common—either through dual HDMI outputs or a combination of HDMI and USB-C/DisplayPort. This makes the Nucbox K10 suitable for multi-window workflows, light creative tasks, and desktop publishing. The device's integrated graphics handle productivity, 1080p media playback, and casual streaming very well; users wanting high-end gaming or heavy GPU-accelerated workloads should look toward discrete GPU solutions.
Performance Characteristics
Performance varies by configuration but the Nucbox K10 is generally positioned for everyday productivity, web browsing, office suites, video streaming, and light content creation. It is a practical choice for:
- Remote work and video conferencing
- Office productivity and spreadsheets
- Media center tasks such as video playback and streaming
- Running small virtual machines or containerized development environments
Power users who plan to compile large projects, perform long encoding sessions, or run intensive simulations should plan for a device with higher thermal headroom or consider an external workstation.
Real-World Use Cases
Understanding how others use the Nucbox K10 helps match configuration choices to needs.
Home Office
In a home office, the Nucbox K10 is often paired with a laptop lid or two external monitors, a wired keyboard, and a webcam. It excels in running videoconference apps, document editing, and browser-based workflows. Installing more RAM and an NVMe SSD provides snappier multitasking for tabs and simultaneous cloud apps.
Media Center
When used as a living-room media device, users configure the Nucbox K10 for quiet operation, connect it to a home AV receiver or television, and install media software or use native streaming apps. Ensuring the OS and video drivers support hardware acceleration for the chosen codecs improves battery and CPU efficiency during playback.
Small-Scale Server / Home Lab
For home labs and lightweight server roles—file serving, Pi replacements, or a small virtualization host—the Nucbox K10 provides a compact, low-power option. Users typically install a Linux distribution or use virtualization platforms that support KVM and containers. Adding an M.2 NVMe for fast storage and configuring RAID or external storage are common practices.
Discover deals on Laptops & Computers — updated daily.
View Offers →Travel and Temporary Workstations
Given its compact size, the Nucbox K10 can travel with a user as a hotel or coworking space workstation. A single USB-C monitor and a compact keyboard/mouse combo make it a robust travel companion for those who prefer a desktop-class environment over a laptop for extended sessions.
Step-by-Step Setup Guide
The following steps guide through unboxing, hardware installation, OS setup, and post-install configuration. This assumes the user has basic tools and a familiarity with installing hardware components.
1. Unboxing and Initial Inspection
- Verify the package contents against the included packing list: mini PC unit, power adapter, screws for VESA bracket if provided, and quick-start documentation.
- Inspect for physical damage and ensure vents and ports are free of debris.
2. Install RAM and Storage
- Ground yourself using an anti-static wrist strap or by touching a grounded metal surface.
- Remove the bottom cover following the manufacturer’s instructions. Keep the screws in a small container.
- Insert SODIMM RAM into the slot at a 45-degree angle, then press down until it locks.
- Install an M.2 NVMe SSD into the M.2 slot; secure with the provided screw. If a 2.5" bay is available, mount and connect it as instructed.
3. First Boot and BIOS/UEFI
- Connect power, a monitor, keyboard, and mouse. Power on and enter the BIOS/UEFI (usually by pressing Esc, Del, F2, or F7 depending on the model).
- Check that the BIOS recognizes installed RAM and storage. Adjust boot order to prioritize the OS installer media if needed.
- Disable unused features (legacy interfaces if not needed) and enable virtualization support (VT-x/AMD-V) if the user will run virtual machines.
- Update the BIOS only if the release notes mention fixes or improvements relevant to stability or hardware compatibility.
4. Operating System Installation
Choose an OS that aligns with the intended use. Windows provides broad driver support and app compatibility; many Linux distributions offer excellent performance and stability for server or developer use.
- Create a bootable USB installer for the chosen OS using reputable tools.
- Follow the OS setup steps and partition the drive according to the use case (separate /home or data partitions for Linux, or a data partition for Windows).
- Install chipset, graphics, and network drivers from the manufacturer when available. For Linux, verify driver status for Wi‑Fi and GPU acceleration; the community often provides tested workflows.
5. Post-Install Configuration
- Install system updates and enable automatic security updates where appropriate.
- Configure power settings to balance performance and noise—use a “balanced” or custom profile for typical users; set performance mode for heavy workloads.
- Set up backup routines. Even for a small device, regular backups to a NAS or external drive protect against SSD failure or accidental deletion.
- For media center setups, enable hardware acceleration in the chosen player to reduce CPU load during playback.
6. Network and Peripheral Optimization
- For stable remote work and streaming, plug into wired Ethernet when possible. If using Wi‑Fi, choose a 5 GHz network and an access point with low channel congestion.
- Prioritize USB-C for docking or single-cable monitor setups to keep desktop clutter minimal.
Pros & Cons
- Pros
- Compact footprint ideal for limited workspace
- Often upgradeable storage and RAM for extended usefulness
- Quiet operation at moderate loads
- Multiple display outputs support dual-monitor workflows
- Energy-efficient compared to full desktop towers
- Cons
- Limited thermal headroom for sustained heavy CPU/GPU workloads
- Upgrade space is constrained—fewer options than a tower
- Some models require careful driver management on Linux
- Repairability can be challenging for first-time upgraders
Comparison: Nucbox K10 vs. Other Popular Mini PCs
| Category | Gmktec Nucbox K10 | Standard Intel NUC | Other Mini PC (e.g., MinisForum/Beelink) |
|---|---|---|---|
| Form Factor | Very compact, VESA-friendly | Compact, highly refined chassis | Varies; often slightly larger for better cooling |
| Upgradeability | M.2 + SODIMM in most SKUs | M.2 + SODIMM, often easier access | Often similar; some models include 2.5" bays |
| Connectivity | Multiple USB ports, HDMI/DP, Ethernet | Similar, sometimes includes Thunderbolt | Similar; some target better GPU options |
| Performance Target | Everyday productivity & media | Wide range from basic to high-performance | Ranges from entry-level to enthusiast small-form-factor |
| Best for | Home office, media, compact workstation | Users wanting verified performance and updates | Users wanting specific performance/portability trade-offs |
Buying Guide: What to Look For
When choosing a configuration of the Nucbox K10 or comparing options, buyers should prioritize the features that match their daily workflows. Use the checklist below to guide the purchase.
Checklist
- CPU and Use Case: Select a CPU tier aligned with tasks. Productivity and browsing require less compute than video editing or virtualization.
- RAM Capacity: 8 GB is a baseline for basic tasks; 16 GB or more is recommended for multitasking, virtual machines, and creative workloads.
- Storage Type and Size: NVMe SSDs provide the best responsiveness. Consider a larger capacity or a second drive if storing local media libraries, virtual machines, or project data.
- Port Selection: Ensure the device has enough USB ports and a suitable video output. A USB-C/DisplayPort option simplifies single-cable monitor setups.
- Networking: For remote work and streaming, prioritize wired Gigabit Ethernet and Wi‑Fi 6 for improved wireless reliability.
- Cooling and Noise: Read real-world reviews for noise levels. If the device will sit in a living room, quieter operation matters.
- Operating System Support: Verify driver support for the chosen OS, particularly Wi‑Fi and GPU acceleration on Linux.
- Warranty and Support: Consider warranty length and the availability of manufacturer support and community resources.
Accessories That Make a Difference
- High-quality USB-C to DisplayPort/HDMI cable for a clean setup
- VESA mount to attach the mini PC behind a monitor and save desk space
- Compact mechanical or wireless keyboard for comfortable typing
- External SSD or NAS for backups and additional storage
Maintenance and Troubleshooting Tips
To keep a Nucbox K10 running smoothly, the following practices help prolong life and maintain performance:
- Periodically clean vents with compressed air to avoid dust buildup.
- Monitor thermal and fan behavior after BIOS updates or driver changes.
- If performance drops under sustained workloads, check for thermal throttling in system logs or monitoring tools and adjust fan curves or power profiles.
- Keep firmware and drivers up to date, but apply updates carefully and read release notes to avoid unexpected issues.
Conclusion
The Gmktec Nucbox K10 Mini Pc represents a practical, compact option for users who want desktop-class features without the footprint of a tower. Its upgrade-friendly design, rich connectivity, and balance between performance and efficiency make it well-suited for home offices, media centers, and lightweight server duties. Prospective buyers should match configuration choices—RAM, storage, and network features—to their intended use and pay close attention to thermal and driver considerations during setup. With sensible configuration and routine maintenance, the Nucbox K10 can provide years of reliable, unobtrusive service in a wide range of everyday computing roles.